9 Drip Irrigation Ideas for Vertical Planters That Dry Out Too Fast
Vertical planters can lose moisture from their upper pockets before the bottom row needs a drink. These nine drip setups deliver smaller, better-placed doses while working around rented walls, weak water pressure, uneven sun, and limited balcony space.
This page contains affiliate links — we may earn a commission at no extra cost to you. See our disclosure.
1. Feed the wall from an elevated gravity tank
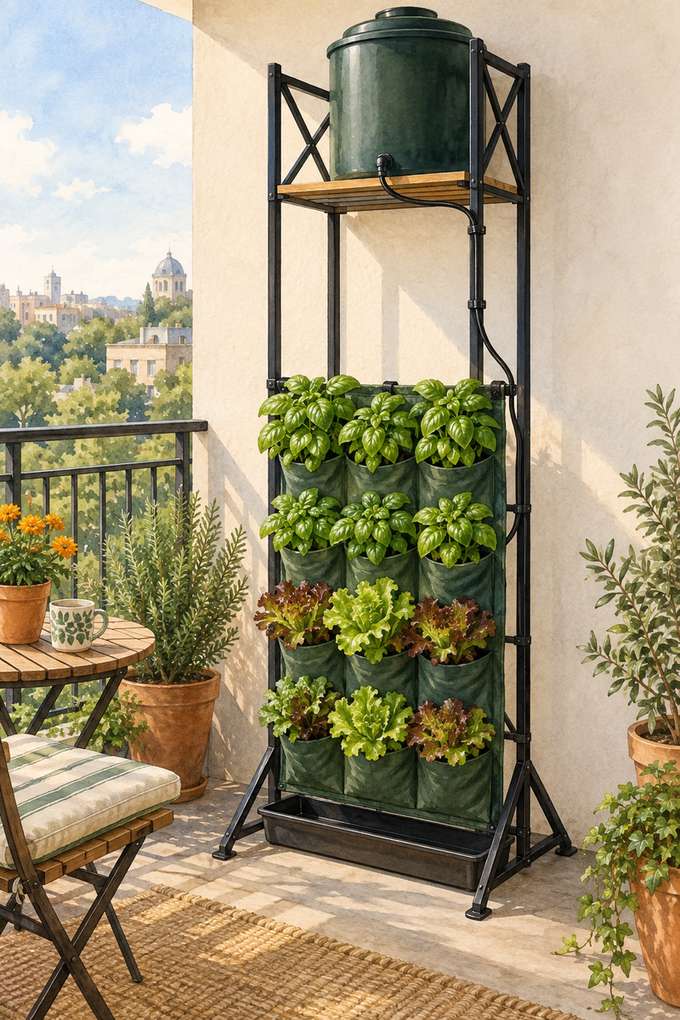
A 2- to 5-gallon covered reservoir can run a short vertical wall without a hose connection. Set it on a sturdy shelf 3 to 6 feet above the highest emitter, then use low-pressure drip tape or gravity-rated adjustable drippers; standard 15-psi emitters may barely trickle. This suits renters because the tubing clips to the planter frame instead of the wall. Water weighs about 8.3 pounds per gallon, so a full 5-gallon tank exceeds 40 pounds before you count the shelf. Confirm the balcony load and brace the stand against wind. Choose an opaque container to slow algae, and test the last emitter with a measuring cup because flow drops as the tank empties.
2. Add a timer and pressure regulator at the hose bib
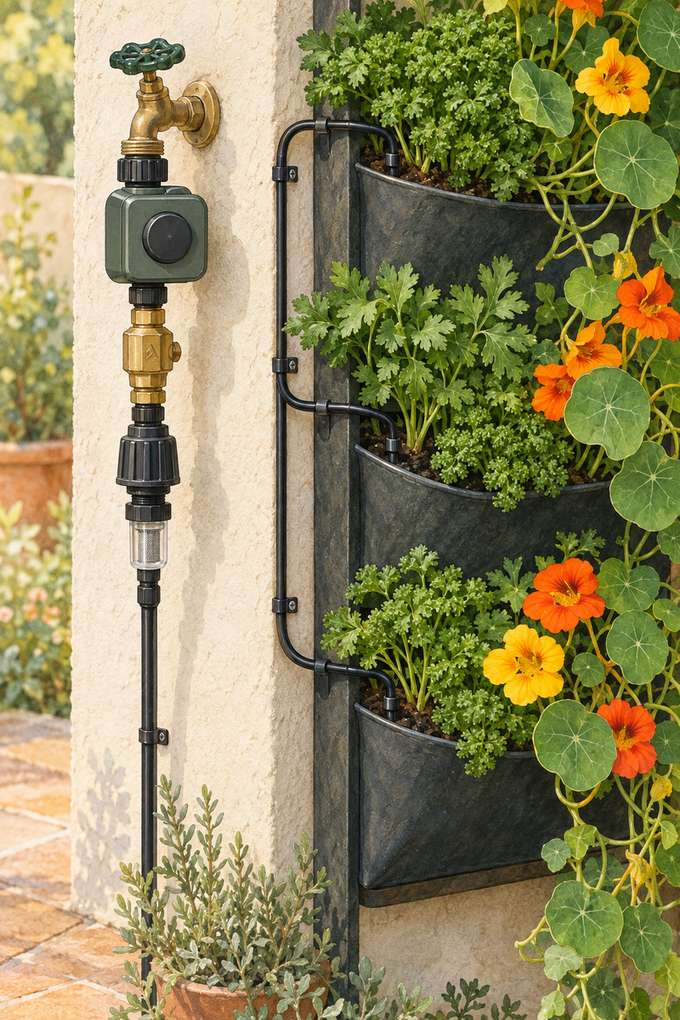
For a patio with an outdoor faucet, start the system with a battery timer, backflow preventer, 15- to 25-psi regulator, and filter in that order. The regulator protects tiny barbed fittings from full household pressure, while the filter catches grit that blocks 1/2-gallon-per-hour emitters. Run 1/2-inch mainline along the planter base and branch upward with 1/4-inch tubing. Check the lease before leaving anything attached to a shared spigot, and never route a pressurized line through an open window from an indoor faucet. The stack of fittings sticks out roughly 8 to 12 inches, so it can be awkward in a narrow walkway. Remove the timer before freezing weather; trapped water can crack its plastic housing.
Product pick — a battery hose timer with a pressure regulator
3. Snake one dripline past every fabric pocket
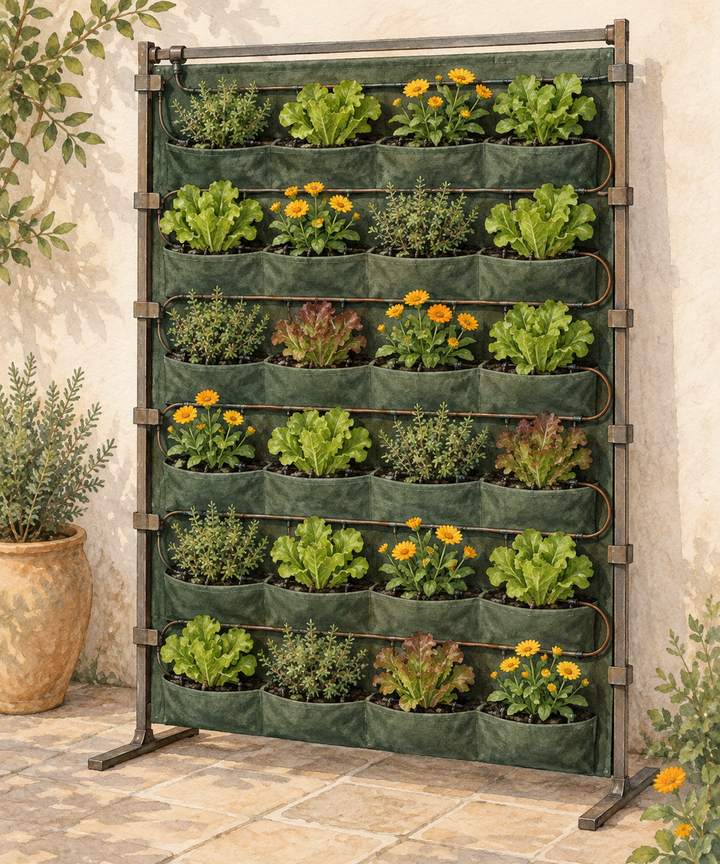
A single 1/4-inch dripline with factory-spaced emitters is the least fussy way to water a fabric pocket wall. Weave it horizontally across each row, using 6-inch emitter spacing, and pin one outlet near the center of every pocket. Keep the total run under the manufacturer's low-pressure limit; on many small kits, 25 to 30 feet is a sensible ceiling. Fabric dries fastest around exposed edges, so bury the line about 1 inch deep rather than laying it on top. The catch is unequal drainage: lower pockets may receive their own drip plus runoff from above. Start with a 5-minute test, then move or plug emitters where water appears in the tray. Flush the open end monthly before recapping it.
4. Give each pocket its own pressure-compensating emitter
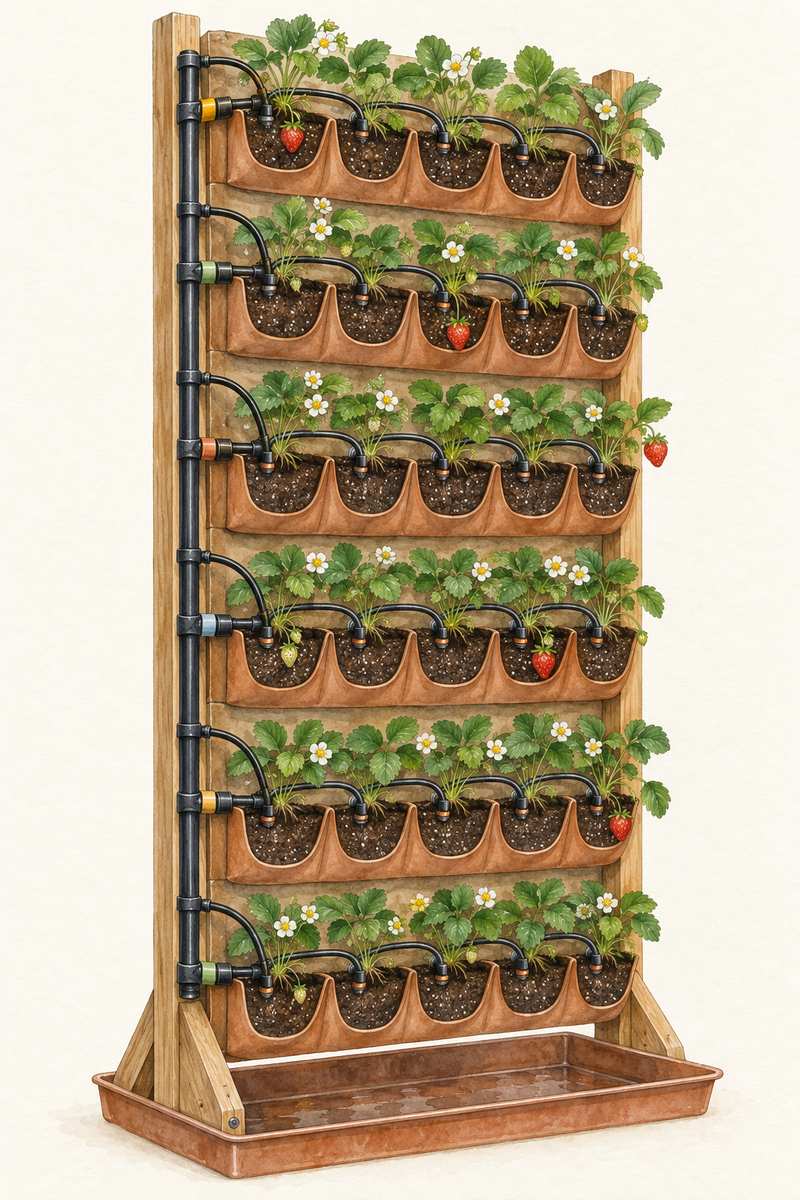
Individual 1/2-gallon-per-hour pressure-compensating emitters make sense when a tall planter waters heavily at the bottom and weakly at the top. Punch each emitter into a 1/2-inch supply line, attach a short 1/4-inch leader, and stake the outlet in one pocket. Matching emitters keep flow closer across a 4- to 6-foot height change than cheap adjustable drippers do. They still need the minimum pressure printed on the package, commonly around 10 psi, so they are a poor match for a low gravity barrel. This layout costs more and creates many leak points, but one clogged outlet can be replaced without rebuilding the wall. Label the leaders by row before planting; tangled black tubes become surprisingly hard to trace behind strawberries.
5. Split sunny and shaded columns into two zones
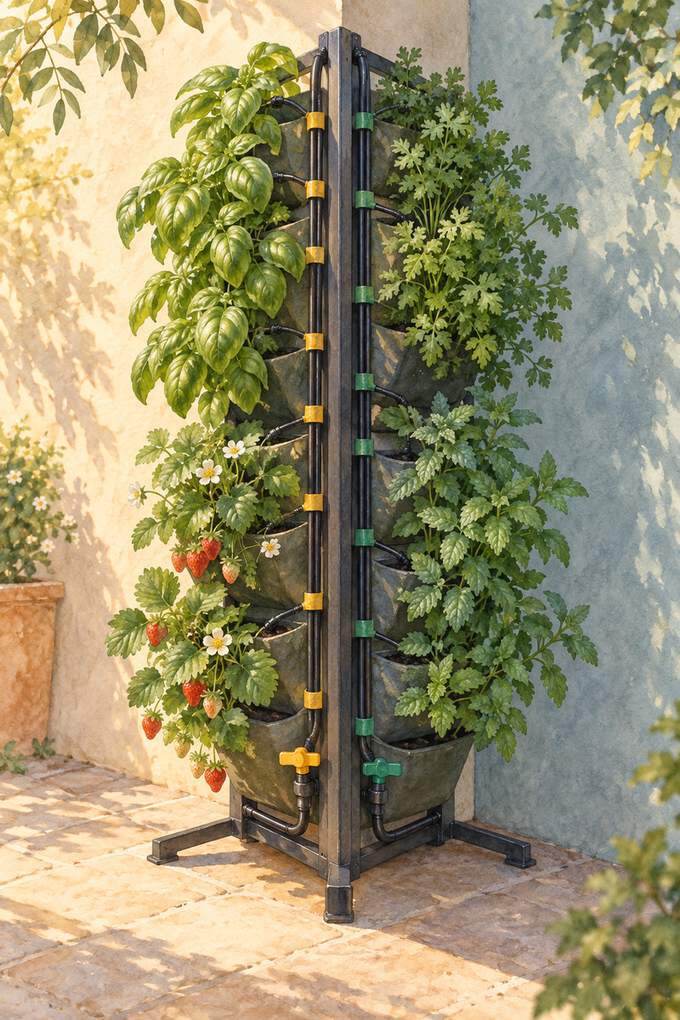
A wall that turns a corner, or gets hard afternoon sun on one side, should not share one watering duration. Divide the planter into two 1/4-inch drip zones with small shutoff valves: one for the hot south- or west-facing column and one for the shaded column. Basil and strawberries may use the sunnier circuit, while parsley and mint sit on the slower side. Begin by running both for 8 minutes, then throttle the shaded valve if its drainage tray fills first. A two-outlet timer offers separate schedules, but it adds cost and needs enough faucet clearance. With one timer, the valves require occasional manual adjustment as summer sun angles change. Mark each valve with colored tape so nobody closes the wrong row.
6. Loop inline drip tubing through long troughs
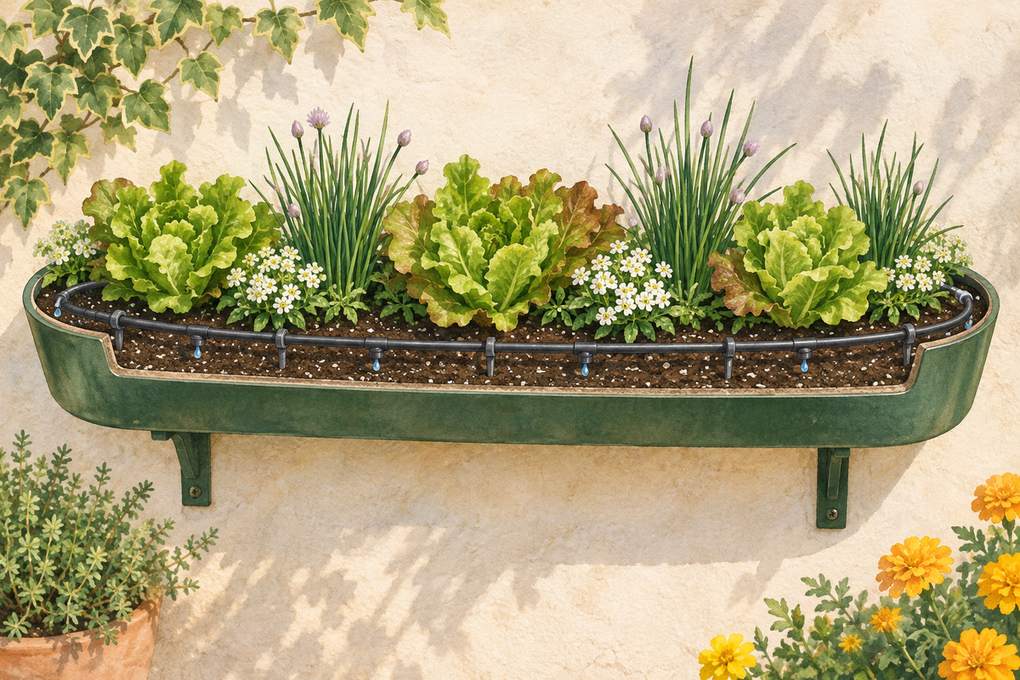
Long wall troughs water more evenly with a loop than with one emitter parked at an end. Lay 1/4-inch inline drip tubing along the back of a 24- to 36-inch trough, curve it around, and return along the front, keeping outlets about 6 inches apart. Secure the loop with plastic stakes and cover it with 1 inch of potting mix. This is useful for shallow-rooted lettuce, chives, and alyssum, whose roots cannot chase a distant wet spot. Tight bends can kink the tube, so use broad curves or elbow fittings at the ends. A loop also uses more water than a single dripper; watch the lowest trough first, since runoff from upper tiers can leave it soggy even when its own line looks modest.
7. Pair top-fed drip with wicks in narrow pockets
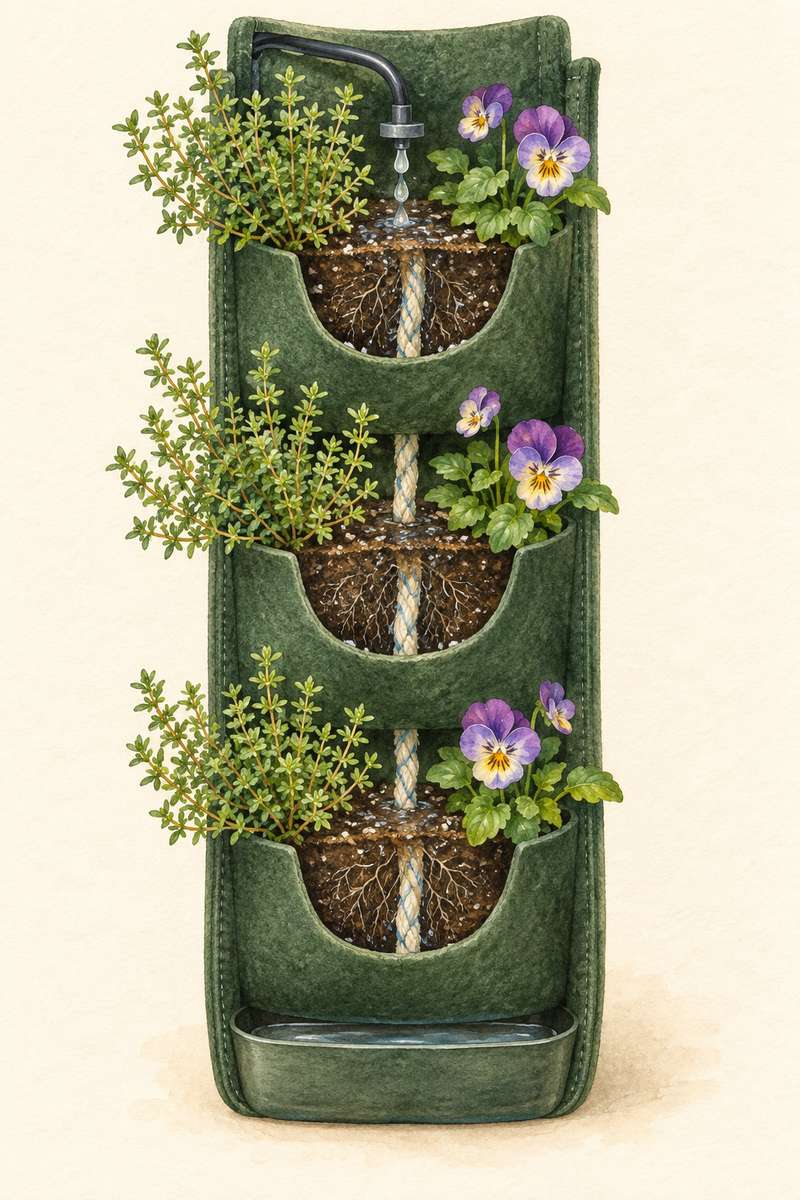
Very narrow felt pockets may shed water down the liner before dry potting mix absorbs it. Put one slow dripper above each column and thread 1/4-inch braided polyester cord from the upper pocket into the two pockets below. The cord spreads a small dose through capillary action, which helps newly planted thyme or violas with short root systems. Pre-wet both the mix and wick; a dry cord can take hours to start moving water. This hybrid works best across two or three levels, not an entire 6-foot wall, and mineral salts eventually crust the cord. Pull and rinse the wicks every month, then replace any that feel stiff. Keep the cord inside the pockets so it does not drip onto a balcony railing or neighbor below.
8. Use bottle drippers as a no-plumbing trial
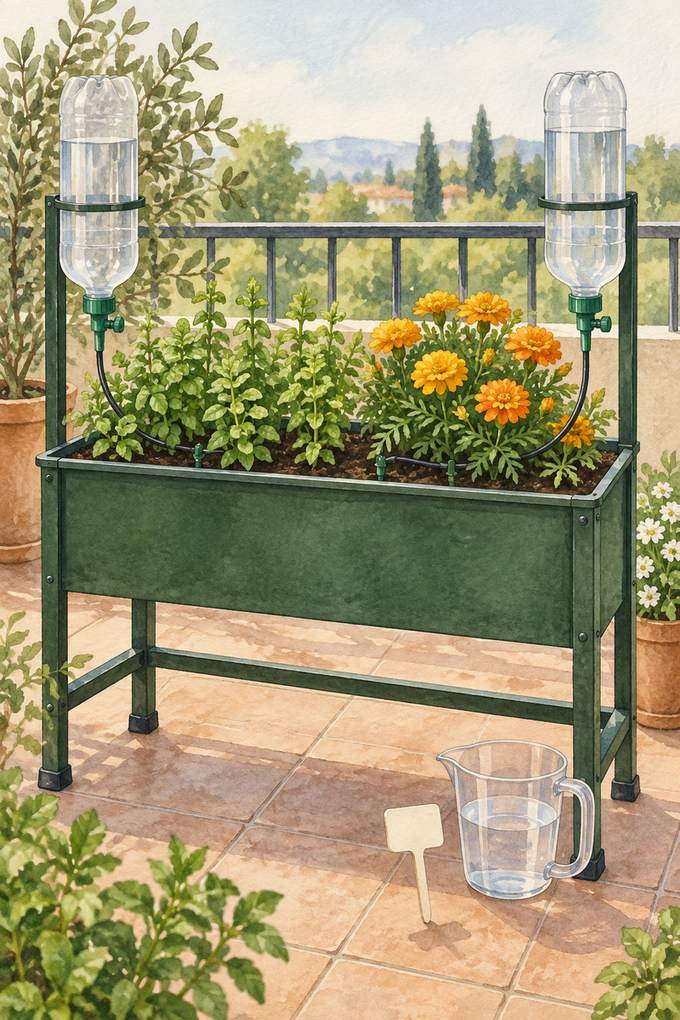
Before buying a full kit, test the planter with 1- or 2-liter bottles fitted with adjustable irrigation spikes. Place one bottle above every two or three pockets and run short tubes to the soil, fastening the bottles to the freestanding frame rather than a wall. This costs little, needs no faucet, and shows which rows dry first over a hot weekend. Bottle flow is inconsistent: fine potting mix can clog the tip, direct sun warms the water, and some spikes empty in hours instead of days. Measure the output over 24 hours before trusting the setup with plants. A 2-liter bottle adds about 4.4 pounds, so do not hang several from a light felt organizer or a railing that the lease forbids using.
9. Recirculate runoff with a timed reservoir pump
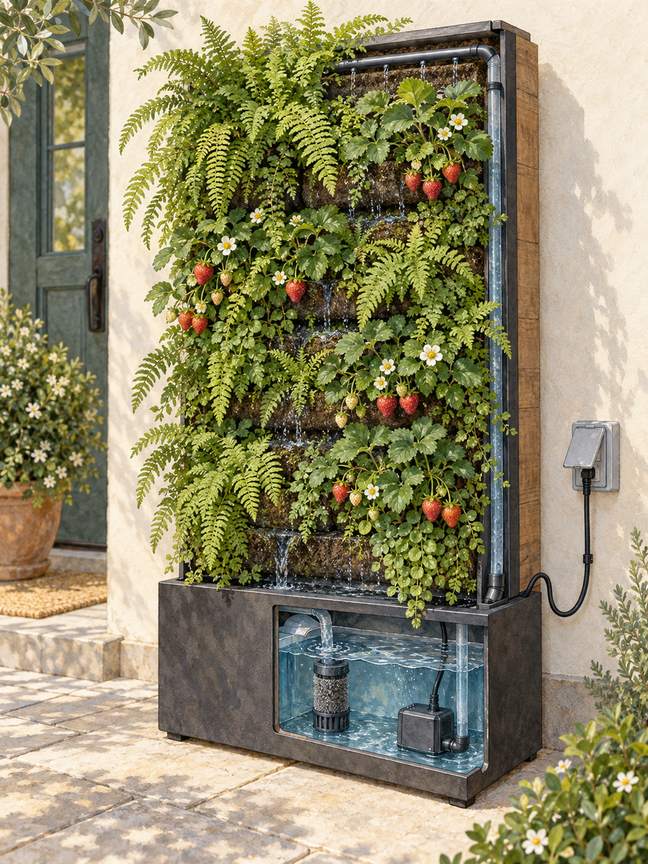
A closed-loop system catches drainage below a living wall and pumps it back to the top header. For a compact 3- by 4-foot unit, start with an opaque 5-gallon tote, a small submersible pump around 80 to 120 gallons per hour, and a seconds-capable timer set for brief pulses. This avoids a permanent faucet connection and keeps water off the balcony floor. It is also the highest-maintenance option: roots, potting mix, and fertilizer collect in the reservoir, while one failed pump can dry the whole wall. Fit a washable prefilter, keep the pump submerged, and inspect the water level every two days in hot weather. Replace the solution rather than endlessly topping it up, and plug the pump into a GFCI-protected outdoor outlet.
Product pick — a compact submersible pump with a washable prefilter
Common questions
- How long should drip irrigation run on a vertical planter?
- Start with 5 to 8 minutes, then check moisture 2 inches into the top, middle, and bottom pockets after 30 minutes. Increase the duration only if the root zone stays dry. Flow rate, potting mix, sun, and pocket size matter more than a universal schedule; two short pulses often soak dry mix better than one long run.
- How do I stop the bottom pockets from getting waterlogged?
- Reduce or cap emitters in the lowest row, and make sure every pocket has an open drain path. Catch runoff in a removable tray and empty it before roots stand in water. If upper-row drainage supplies enough moisture, the bottom row may need no dedicated emitter at all.
- Can I leave a vertical drip system outside in winter?
- Drain tubing, open end caps, and bring battery timers, filters, pumps, and regulators indoors before the first hard freeze. Rigid fittings can split when trapped water expands. In frost-free areas, inspect lines monthly for algae and roots; local freeze timing still depends on your zone and exposure.
- Will a reservoir or drip system exceed my balcony weight limit?
- Count water at about 8.3 pounds per gallon, plus wet potting mix, containers, shelving, and plants. A full 5-gallon tank alone weighs over 40 pounds. Keep heavy reservoirs near structurally supported areas and ask the building manager for the balcony's rated load rather than relying on a generic number.